

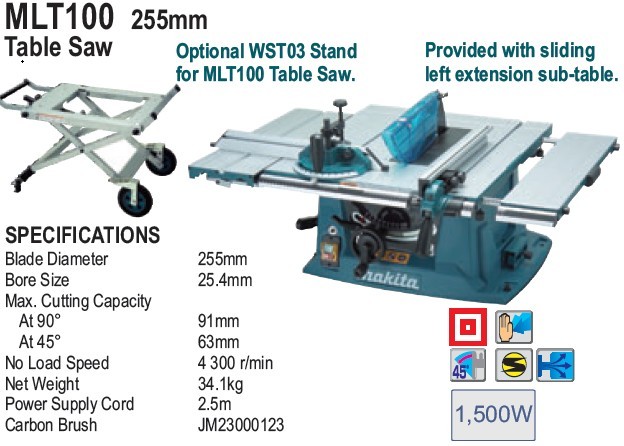
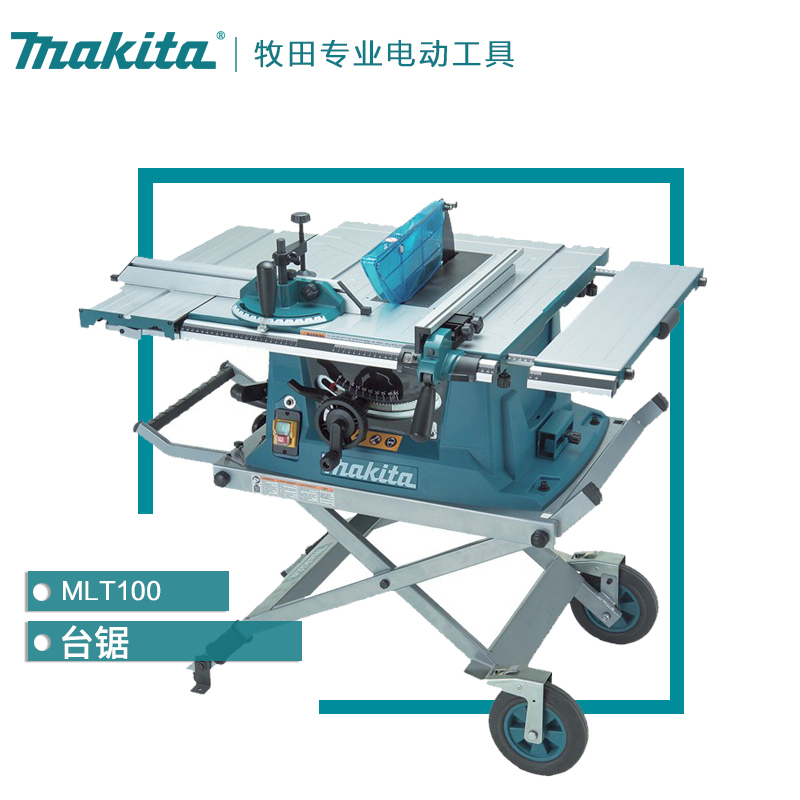
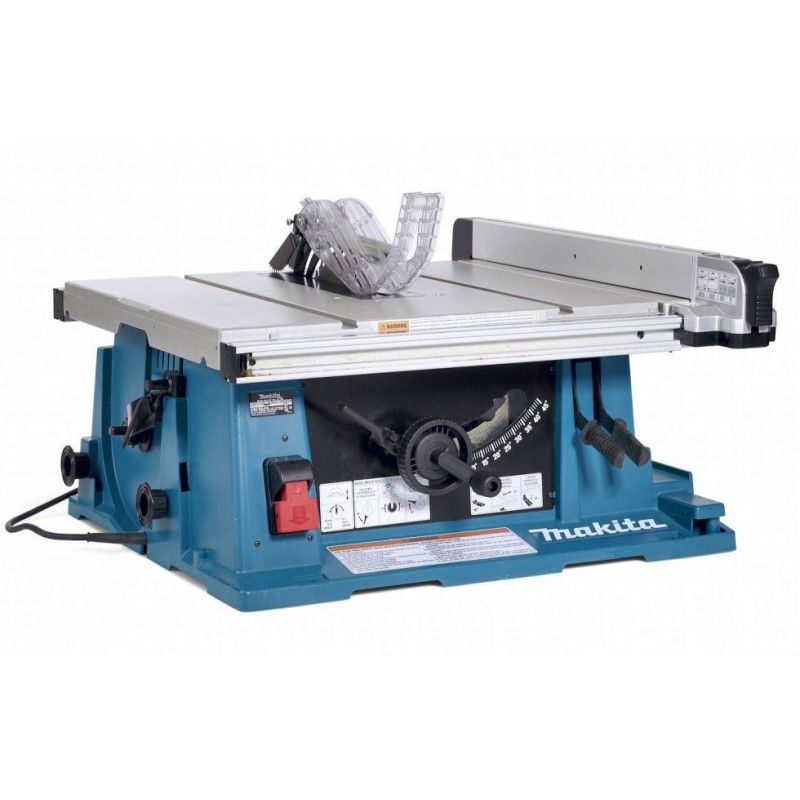
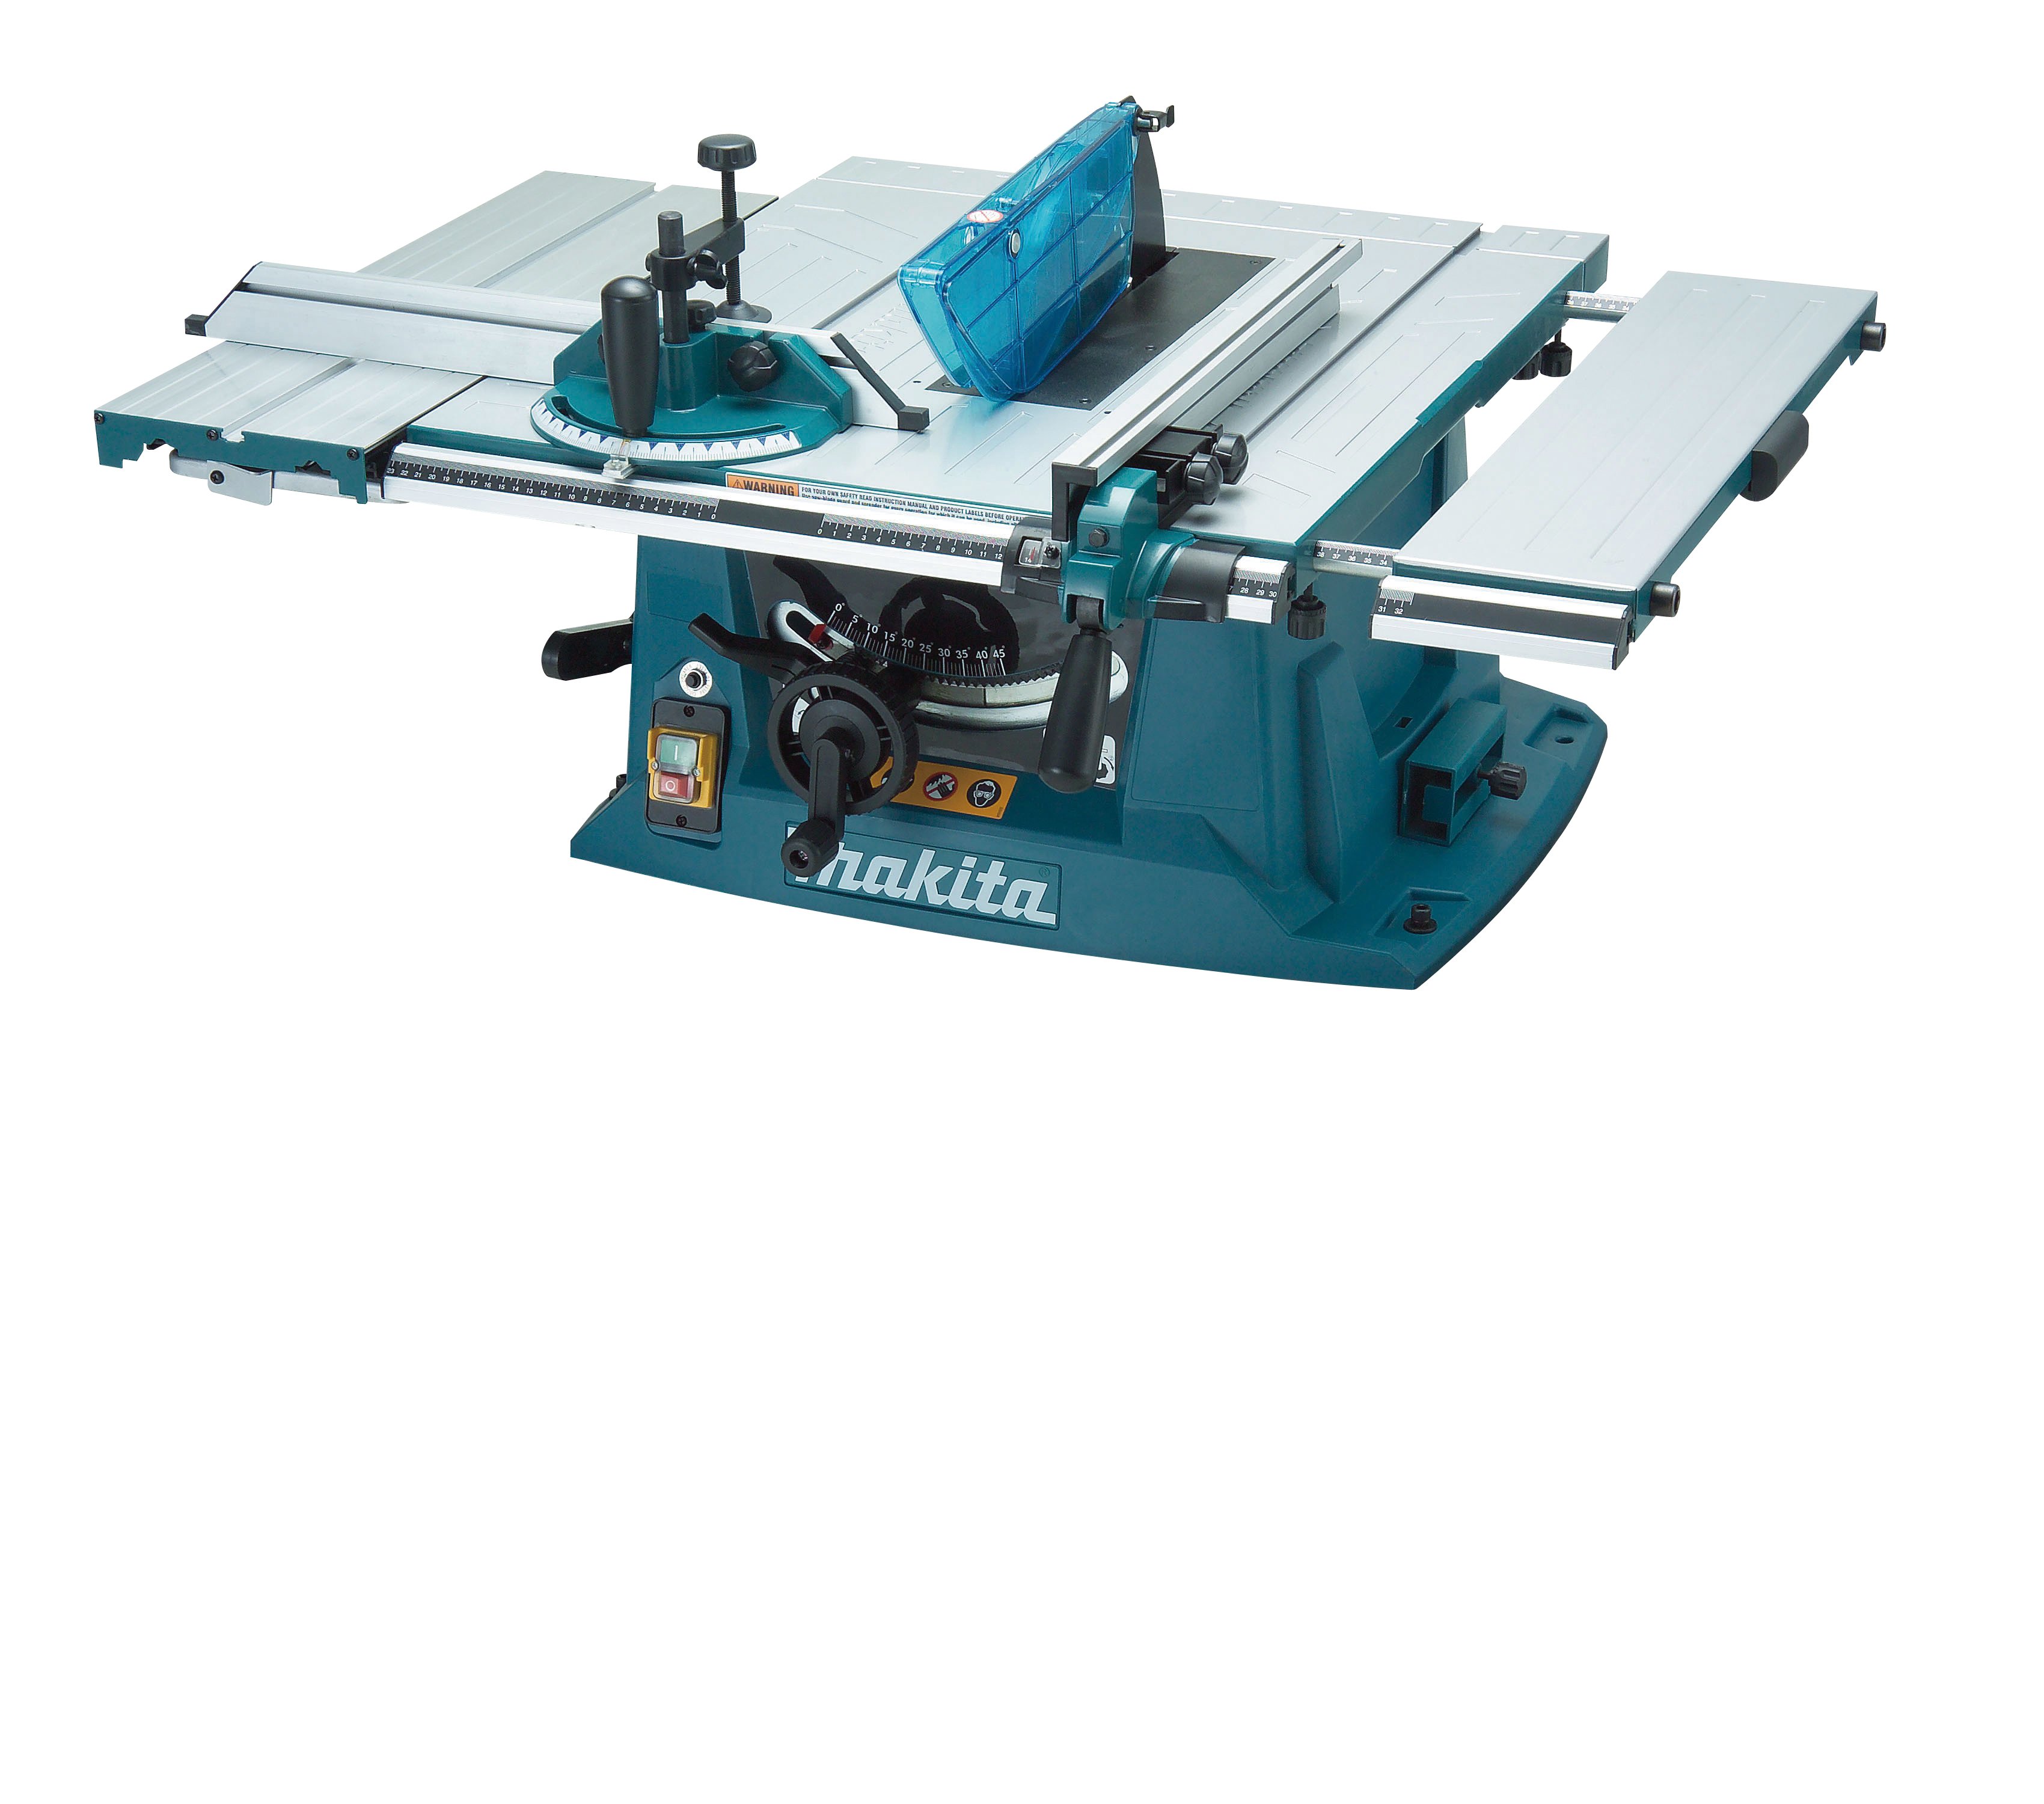
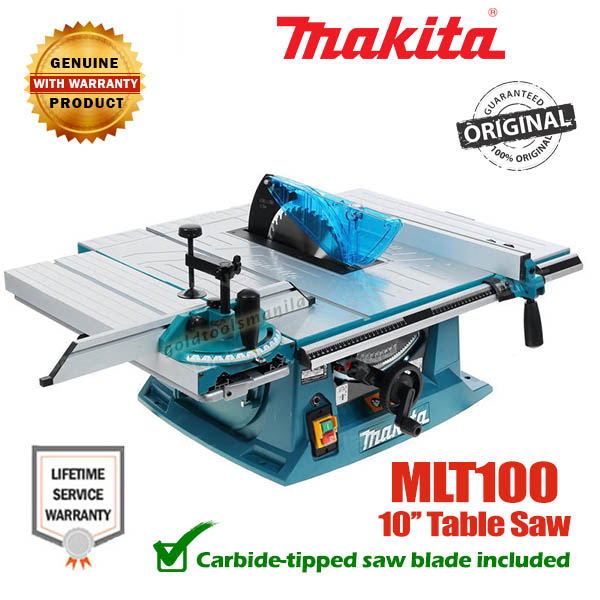
Makita MLT100 Циркулярная пила настольная. Назначение, область применения
Настольная циркулярная пила (синономы: пила дисковая, станок циркулярный, станок распиловочный дисковый) модели Makita MLT100 предназначена для индивидуального использования для обработки древесных заготовок, древесностружечных и древесноволокнистых плит: продольного или поперечного, косого, наклонного и комбинированного пиления заготовок.
Циркулярная пила Макита MLT100 является наиболее дорогостоящей моделью среди дисковых станков от японской компании, ее стоимость составляет 42 тысячи. Данный станок применим не только в бытовой сфере, но и на небольшом производстве.
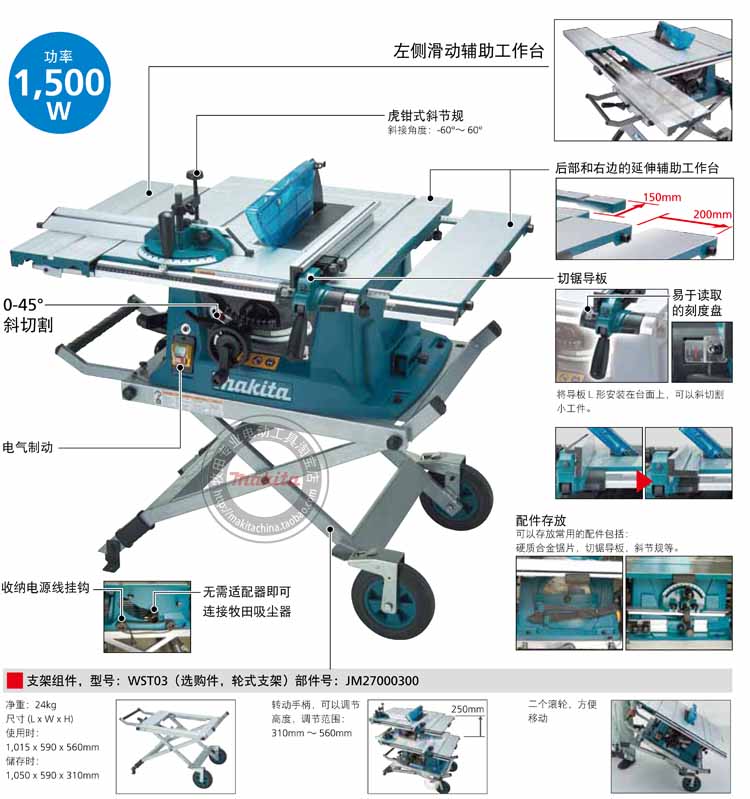
Пила дисковая Makita MLT100 выгодно отличается мощным двигателем 1,5 кВт, с числом оборотов холостого хода 4800 об/мин для выполнения пропилов глубиной до 91 мм.
Не допускается обработка: алюминия и другие цветных металлов, асбоцементных материалов, мягких пластмассовых и резиноподобных материалов. Пила не рассчитана на работу при непрерывном производстве.
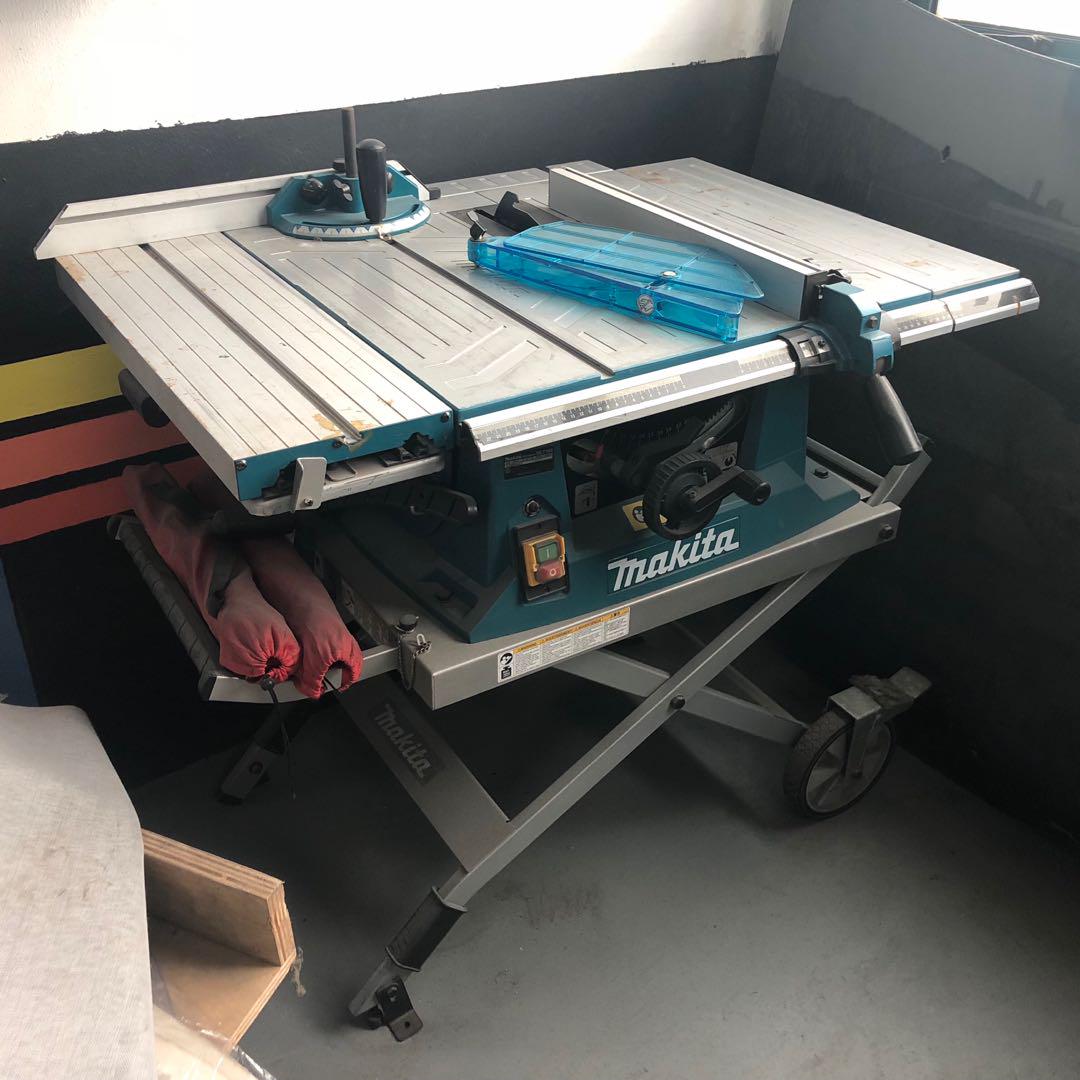
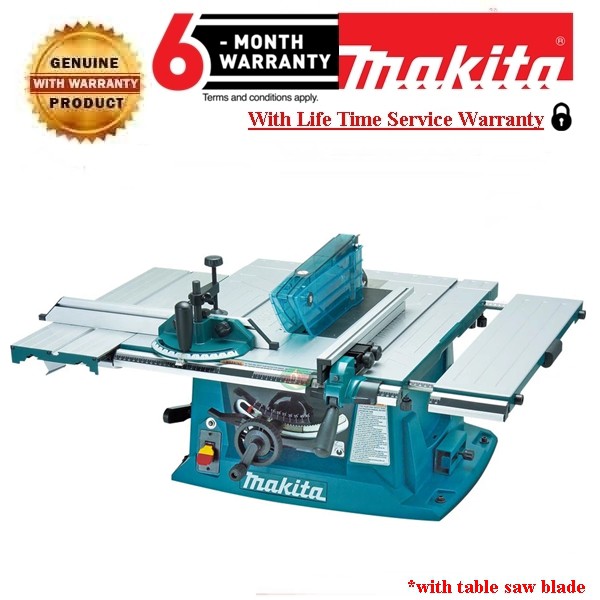
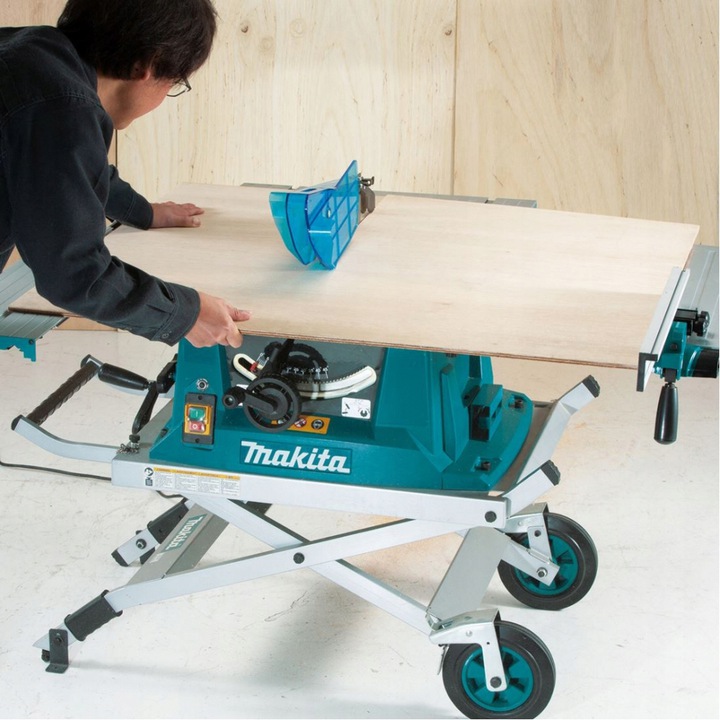
Циркулярная пила Makita MLT100 – начальный вариант для оснащения столярной мастерской, и в то же время способна удовлетворить многих профессионалов, которым не требуется обрабатывать большие объемы древесины или массивные заготовки из нее. Сильные стороны модели – компактность, мобильность, высокая точность при работе с небольшими деталями, перенастраиваемая конструкция.
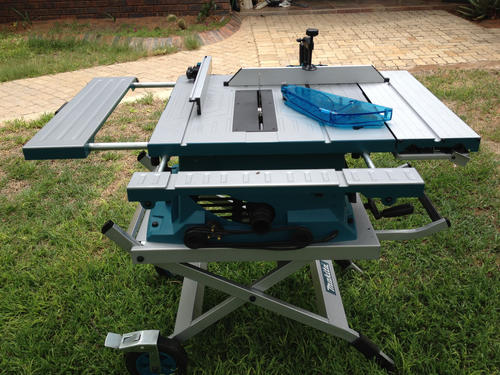
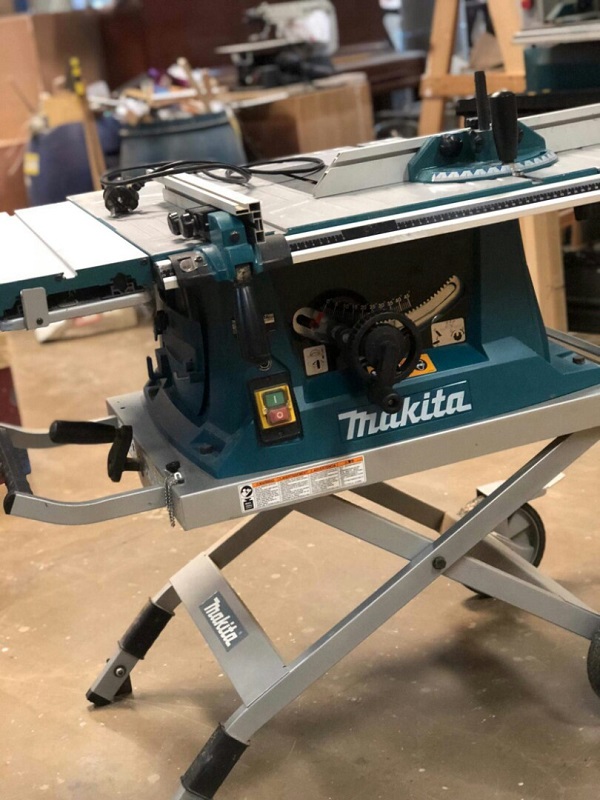
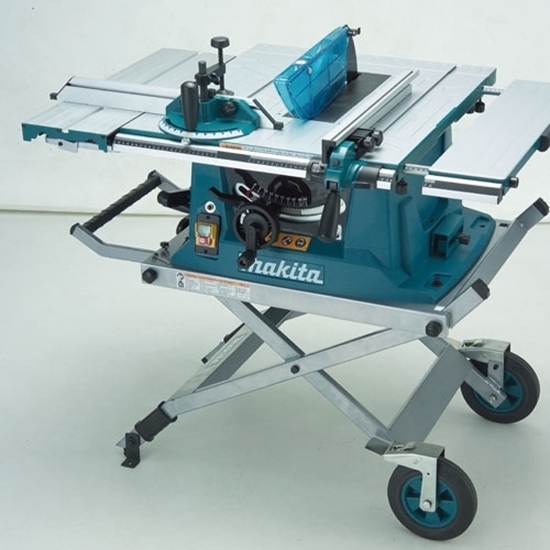
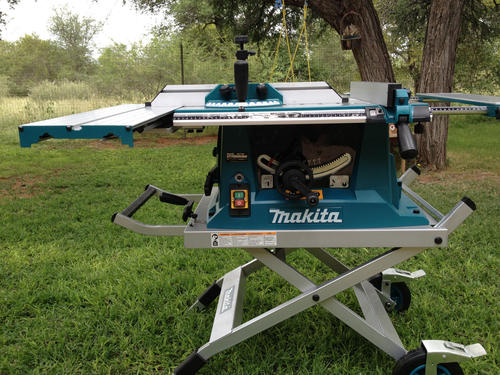
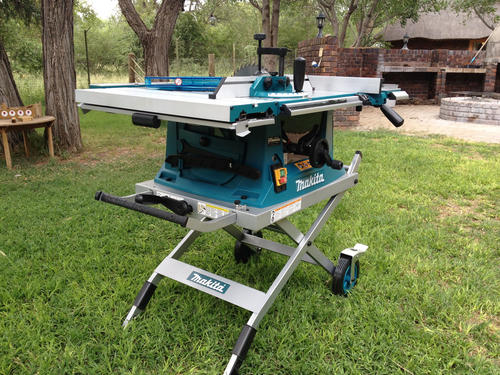
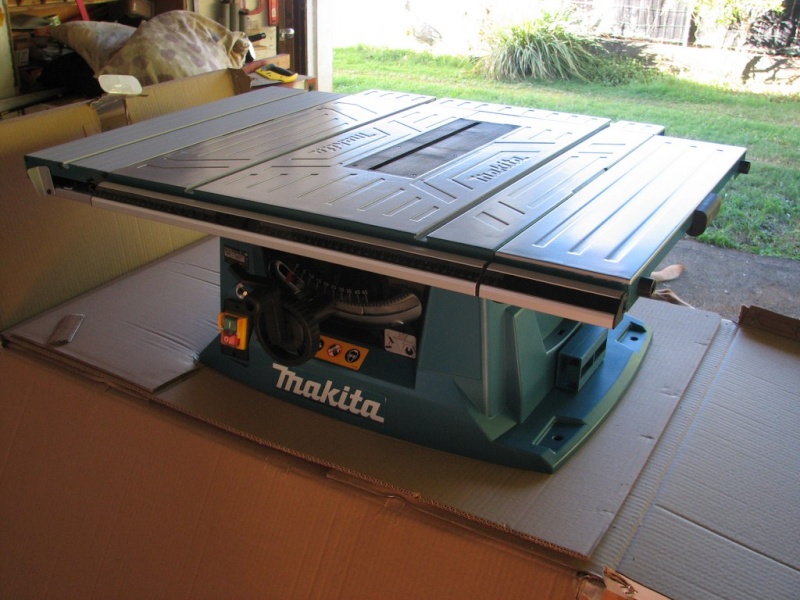
Компактная невысокая пила легко помещается на верстаке, но может устанавливаться и на пол: в комплект входит набор ног и уголков для сборки открытой подставки.
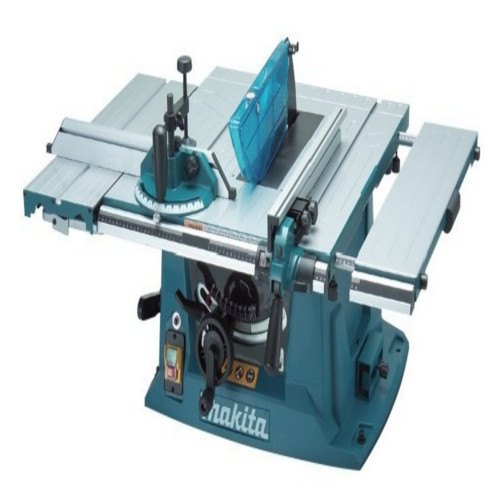
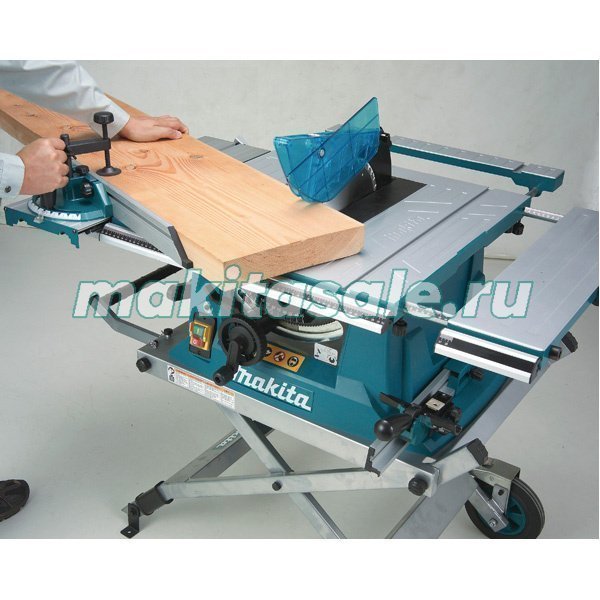
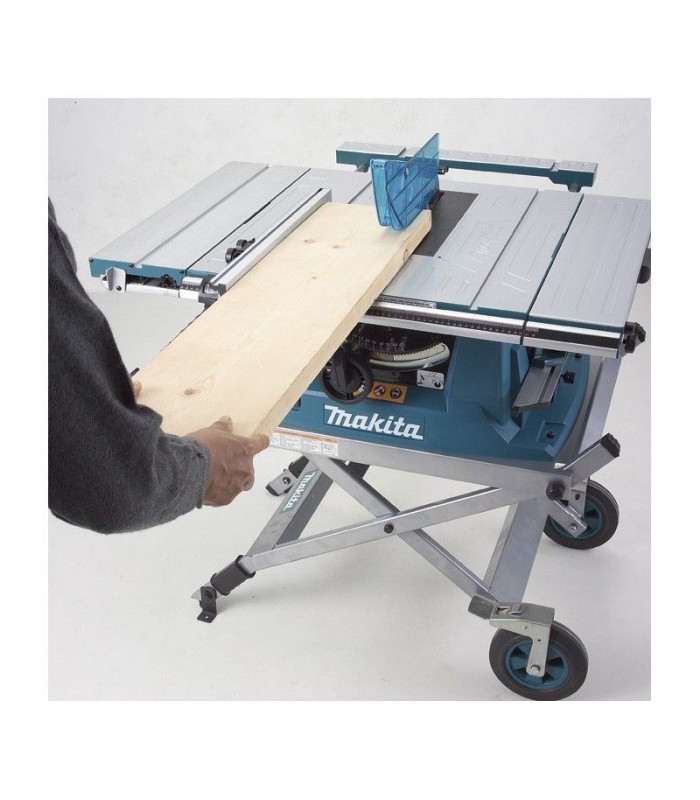
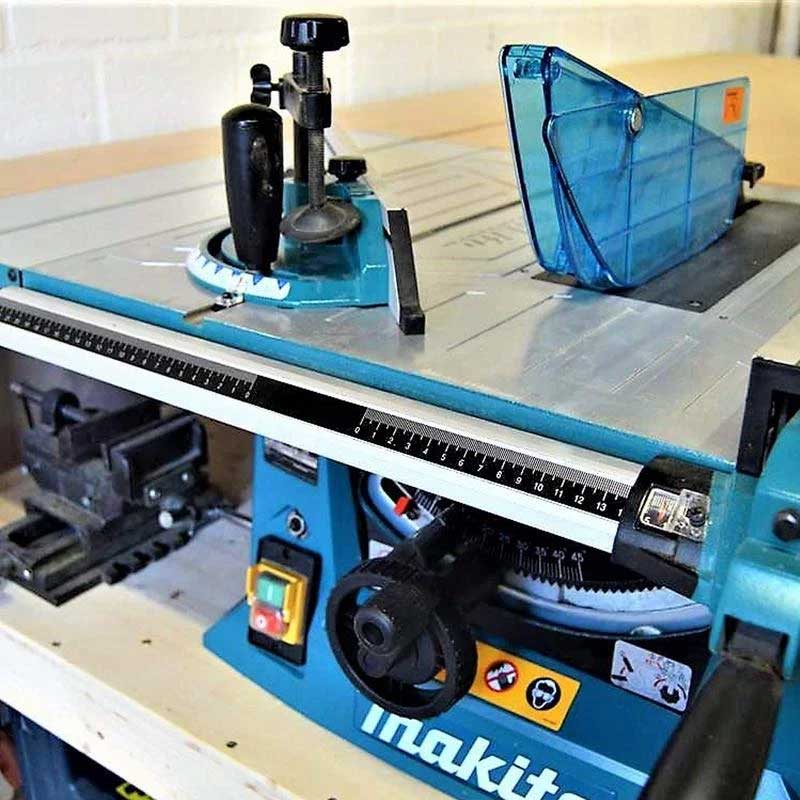
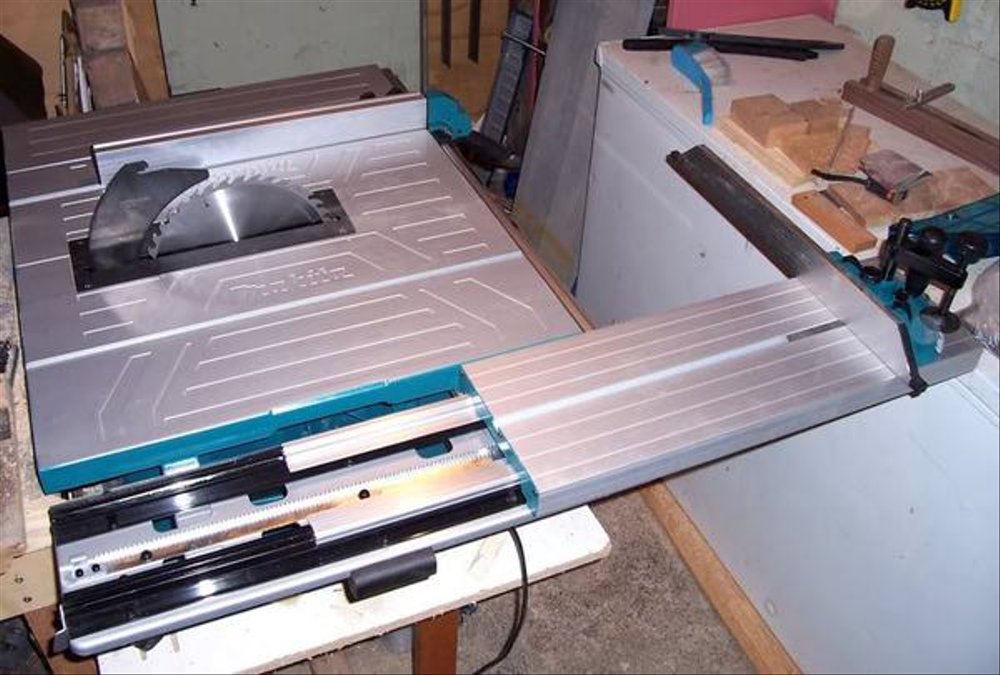
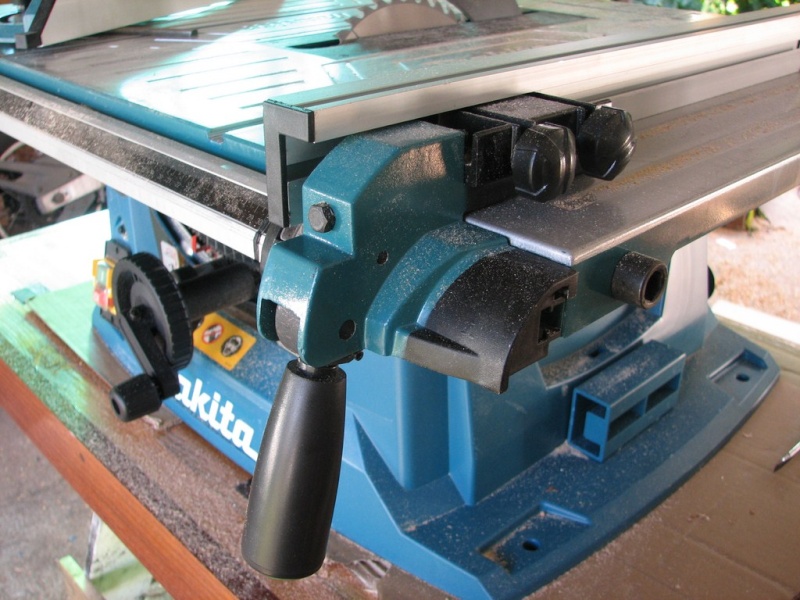
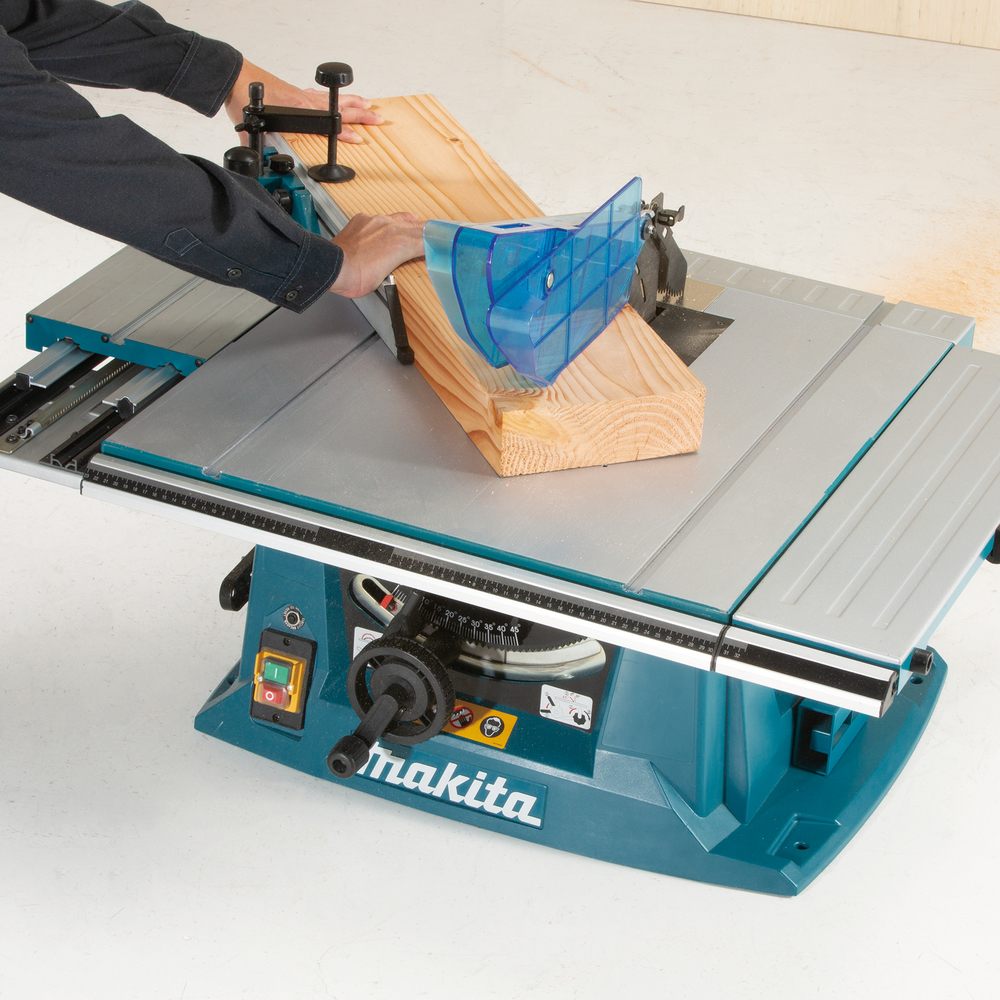
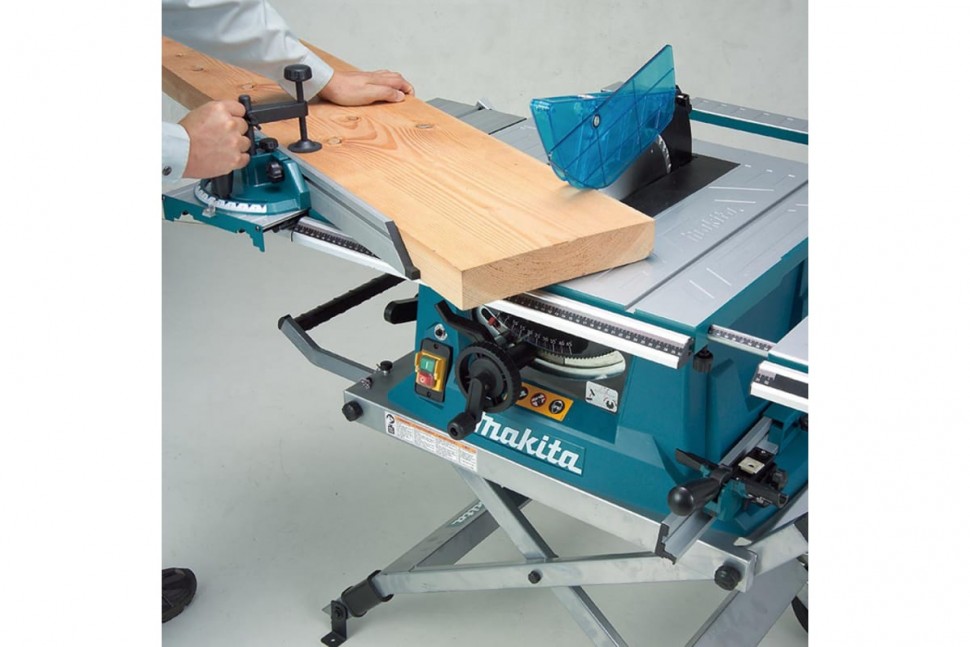
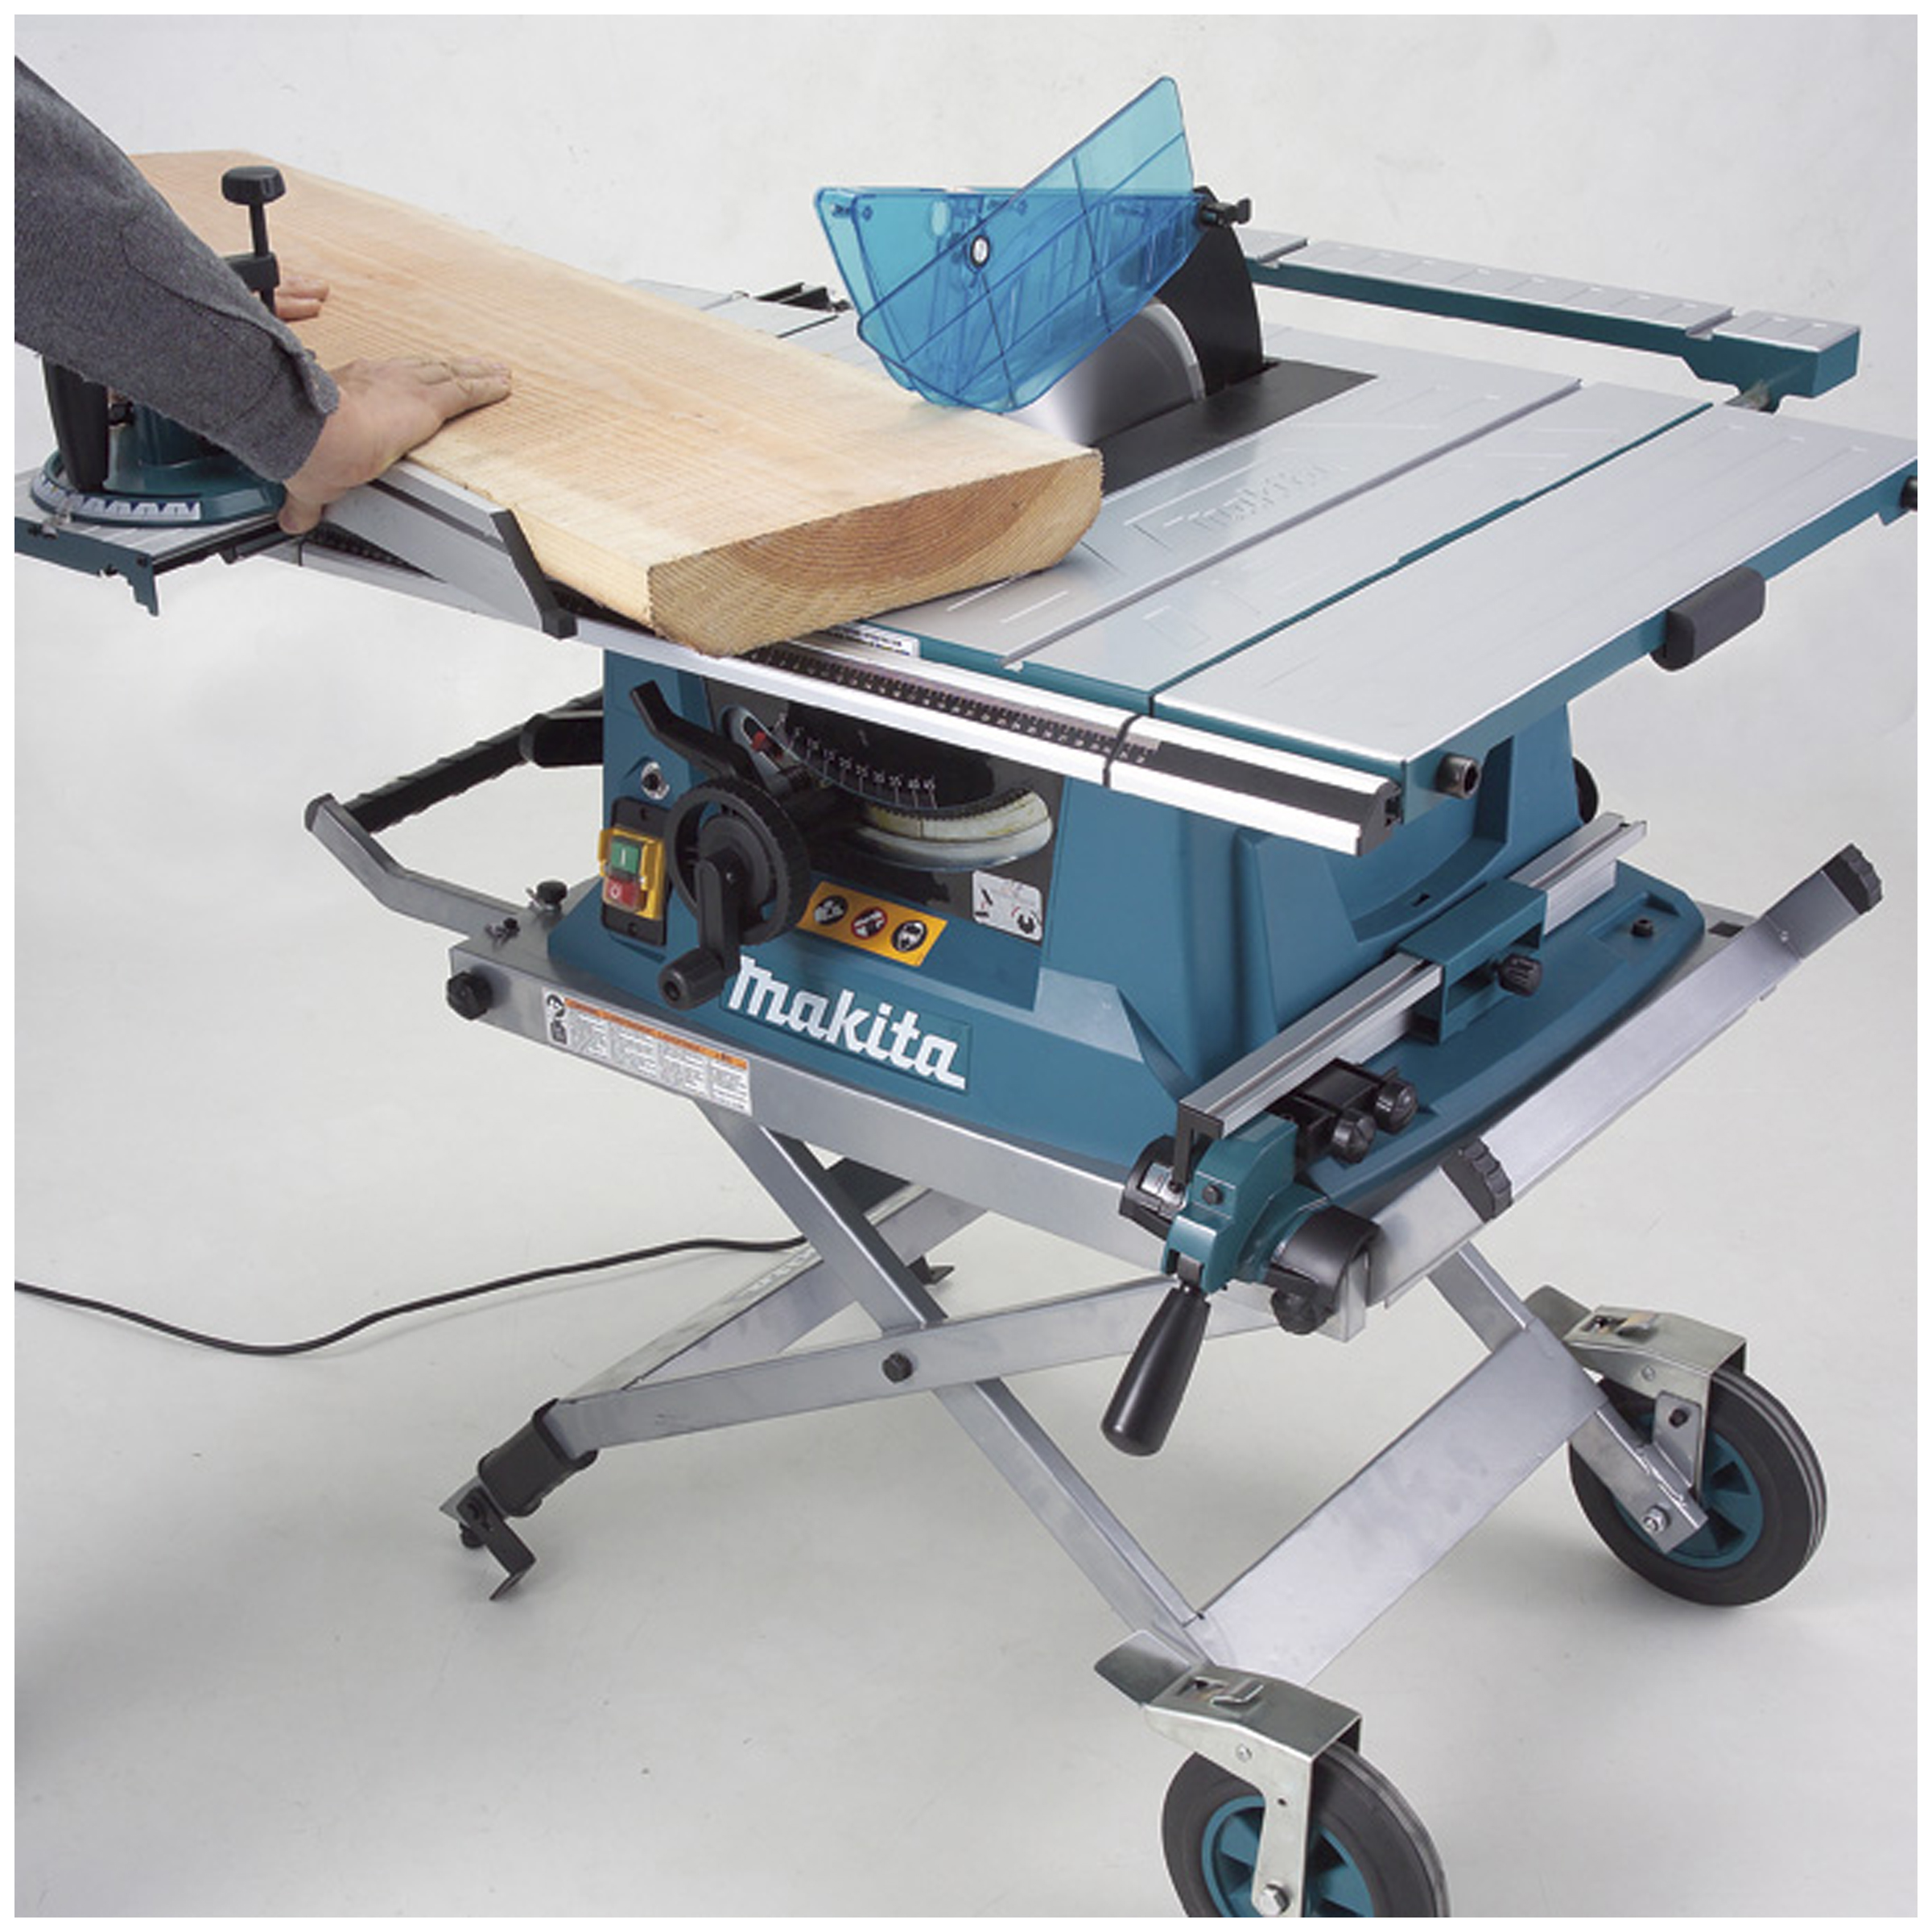
Станок MLT100 выполняет косые, комбинированные, прямые и поперечные распила, а также торцевание. Станок унаследовал от младших моделей систему стабилизации пускового тока, электрический тормоз и 4-ех секционный рабочий стол. Однако конфигурация стола в 2704 несколько изменена — на его правой стороне расположена рукоять для изменения наклона диска, а левая и правая части являются раздвижными, что позволяет обрабатывать крупногабаритные заготовки.
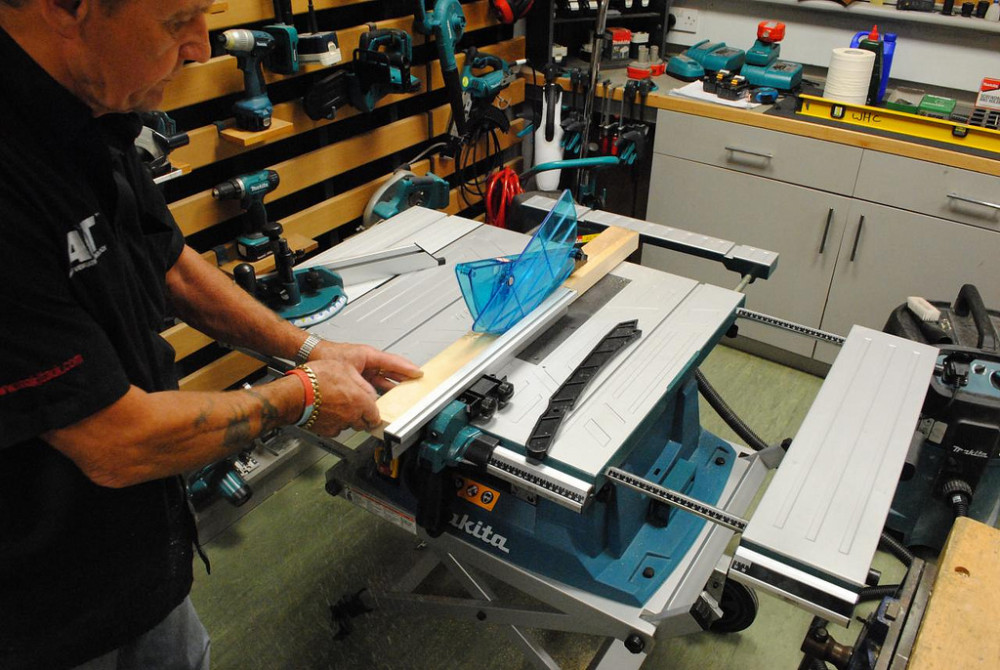
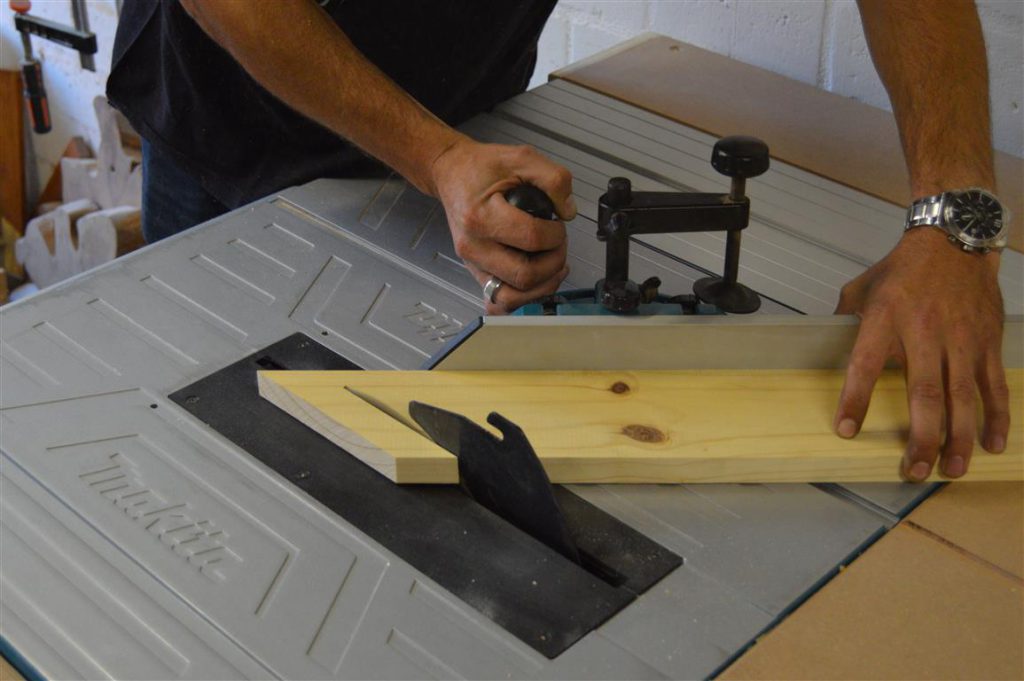
Сам рабочий стол выполнен из литого алюминия, его поверхность отшлифована, что исключает проблемы с перемещением обрабатываемых заготовок. Канавки под установку транспортиру предусмотрены как слева, так и справа распиловочного диска. Транспортир имеет совмещенную с планкой конструкцию: при выполнении косого распила вы перемещаете транспортир, а прикрепленная к нему планка толкает деталь. Так можно аккуратно и безопасно для оператора выполнить точный распил под требуемым углом.
Технические особенности конструкции пилы Makita MLT100:
- Станок выполняет продольные и поперечные резы (торцевание, раскрой) древесины любых пород толщиной до 93 мм
- Плавный пуск двигателя мощностью 1500 Вт позволяет начать работу без рывка
- Имеется система гашения вибраций во время работы и быстрого торможения двигателя после выключения
- Плавная регулировка наклона пильного диска обеспечивает вертикальные углы распиливания от 90° до 45°
- Угловой упор обеспечивают высокоточное пиление (торцевание) под углом от –60° до +60°
- Плавная регулировка пильного диска до 93 мм по высоте
- Имеется саморегулирующийся параллельный упор для точных прямолинейных пропилов
- Разъем для подключения пылесоса — гарантия чистоты рабочей зоны
- Малый вес и габариты удобство транспортировки и хранения
Станок работает от однофазной сети переменного тока напряжением 220 В частотой 50 Гц.
Станок может эксплуатироваться в нормальных климатических условиях:
- температура окружающей среды от 1 до 35°C
- относительная влажность воздуха до 80 % при температуре 25°C
Распиловочные станки аналогичной конструкции, представленные в России
- Makita 2704 – 1,65 кВт
- Makita MLT100 – 1,5
- Bosch PTS 10 – 1,4 кВт
- Bosch GTS 10 j – 1,8 кВт
- Bosch GTS 10 xc – 2,1 кВт
- AEG TS 250 K – 1,8 кВт
- Metabo TS 250 – 2,0 кВт
- DeWalt DW 745 – 1,7 кВт
- DeWalt DW744XP – 2,0 кВт
Инструкция по эксплуатации
Торцовочные пилы Makita отличаются высокой надежностью, отличной сборкой, им не свойственны системные неисправности или отказы в работе. Чтобы приобрести качественный оригинальный, а не фальшивый инструмент, следует обращаться исключительно к официальным дилерам компании.
Устройство торцовочной пилы
При покупке обратить внимание на маркировку – практически на каждой детали оригинала имеется код, изображение торговой марки. Все элементы и узлы тщательно обработаны, не имеют малейших изъянов или трещин
Успешная работа торцовочными пилами требует неукоснительного соблюдения правил техники безопасности:
- Нельзя использовать инструмент не по прямому назначению, вносить какие-либо изменения в конструкцию.
- Следует строго соблюдать правила безопасной работы с электроинструментом: учитывать напряжение сети, правильную эксплуатацию сетевого кабеля, исключить взаимодействие пилы с агрессивными средами и влагой.
- Необходимо систематически тестировать состояние пильных дисков – степень заточки, наличие повреждений, правильность установки, состояние защитного кожуха.
- Целесообразно перед началом эксплуатации торцовочной пилы Макита внимательно ознакомиться с заводской инструкцией по эксплуатации, освоить приемы работы, рекомендации по обслуживанию инструмента.
Детально ознакомиться с устройством торцевой пилы, выполнением настроек, правилами обслуживания и эксплуатации можно в инструкции: Ваш браузер не поддерживает фреймы Скачать Руководство по торцовочной пилой LS1040
Для эффективной результативной работы предусмотрены вспомогательные аксессуары для пил – параллельный упор, направляющая шина, чемодан и кейс Макпак для транспортирования инструмента, удобный шестигранный ключ.
Key features of the Makita 2704
10-inch blade
The blade diameter is 260mm. It has a decent size that makes it powerful enough to cut through large piles. The blade has a 40 tooth Tungsten carbide-tipped blade.
Rotations per minute
The 1650 Watt motor makes 4800rotations per minute. It is powerful enough to increase the speed of the machine. That is why it makes you complete a task in a short period.
Pinion fence rails
The fence makes the task accurate. The adjustment mechanism that it comes with allows you to have accuracy when cutting. It makes the operation smooth.
Blade angle
The blade can sit at a 90-degree cutting angle and cuts down to 93mm. When it is at 45 degrees, it goes down to 64mm. The angle is adjusted from -0.5 to 45.5 degrees.
Accurate cutting
Several features make the table saw accurate. The tabletop is super flat, which makes it precise. The T-slot miter gauge secures the work-piece. The rip fence is smooth and accurate.
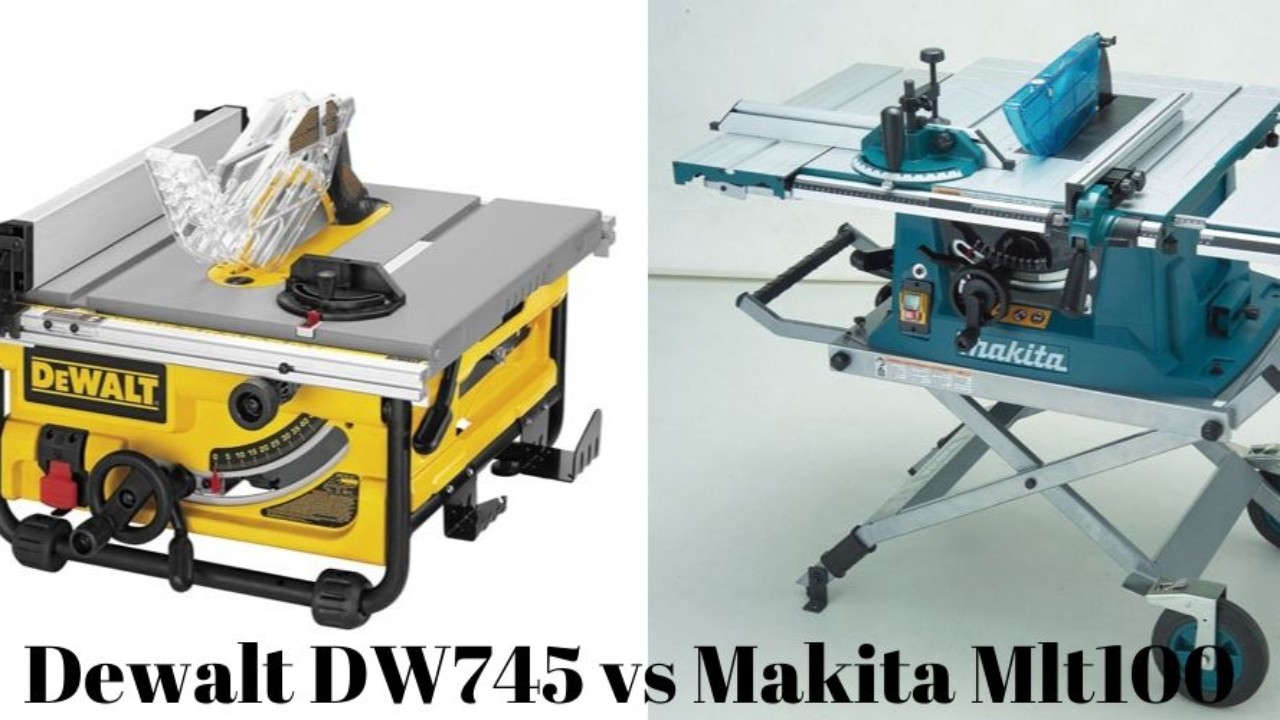
Conclusion
After reviewing these two models of power tool, and taking into account our own experience of working with wood, it is the DeWalt DW745 table saw that is our favourite. This is down to a number of things.
Firstly, the design of the DeWalt is superior to that of the Makita in that the guard and fence systems work better to provide a great rip capacity. The type of warranty the DW745 comes with is also better than the one that comes with the MLT100.
Furthermore, the DeWalt is much lighter and thus easier to pick up and transport. It also makes much more accurate and better quality cuts thanks to its highly powerful motor.
We hope you found this article of use and that it helped you to make a more informed decision as to which table saw to purchase. Now it is time for you to go out and buy one.
DeWalt DW745 Table Saw
Table of Contents
This is a great table saw for those individuals wanting a middle of the road power tool that comes backed with lots of good functions and features. It is appreciated by all that use for its durability, accuracy and its portability.
Armed with a 15 amp motor, the table saw has lots of torque meaning it can easily cut through lumber and even hard woods. The 10 inch cutting blade can reach a maximum of 3,850 RPM of speed. With the fence on the DeWalt you are able to cut through a work piece as wide as 20 inch.
The fence has a rack and pinion, which means it can be precisely and quickly adjusted. Its telescopic function allows for the rails to protrude a further 20 inch. The maximum cutting depth at 90 degrees is over 3 inch and at 45 degrees is over 2 inch.
The DW745 weighs just 66 pounds and can be carried from job to job easily thanks to the base having a firm grip. DeWalt have added on board memory to the table saw, which means gaining access to the Site Pro Protection components much easier.
The surface of the table on this power tool has been coated in a special solution to decrease the level of friction and thus improve the cutting quality. The base of the roll cage on the DeWalt is made of metal in order to add a greater level of durability and stability to the power tool than plastic would provide.
Specifications
- A 1,850 watt motor
- A 15 amp motor
- 120 volts
- Up to 3,850 RPM of speed
- A 10 inch cutting blade
- A maximum cutting depth of over 3 inch at 90 degrees and over 2 inch at 45 degrees
- A 2.5 inch dust port
- A total weight of 66 pounds
Step 3 | Assembling the inside of the fence
To assemble the side, start by attaching the top part in the right place. Place the bolts in the groove of the original Makita table saw guide and slide the part with the drilled holes over the bolts. Place the washer and nut and tighten.
Attach the side to the top part by temporarily clamping it.
Now detach the parts from the original guide and screw the two parts together via the pocket holes at the bottom.To make this connection even stronger, you can use wood glue. If you want to know more about wood glue, I can recommend you to read another article I wrote on this website. In that article, you will find all the information on how to find the best wood glue for your project.
Upgrade 2 | Installing a T-track
To clamp some jigs and my push stick organizer to the DIY table saw fence upgrade, I attached a T-track rail on the outside. In order to make a slot in your guide, detach this side from the guide, so you could make a slot in it where the T-track fits in. To make this slot easily you can use my homemade Kerfmaker idea. First, you measure the thickness of the saw blade, and then you set the thickness of the slot you want to make.In this case, the width of the T-track.
By setting the Kerfmaker along with the guide, you can make perfect slots.
Afterward, you can update the slot with a chisel and mount the T-track with screws. Once the T-track is installed, you can assemble the new guide onto the original Makita table saw fence.
Differences
- The Makita mlt100 makes 4300 rotations per minute, whereas 2704 makes 4800 rotations per minute.
- The table surface of the Makita mlt100 is more spacious than 2704.
- The fence of the Makita mlt100 has alignment problems, whereas the fence system of 2704 is accurate.
- The Makita mlt100 has a sliding table on the job site jaw, whereas 2704 does not have.
- The Makita mlt100 has a plastic base, unlike 2704, which does not have a plastic one.
- The Makita mlt100 has a dust port that makes it compatible with a vacuum.
- The Makita mlt100 table saw makes noise, especially when starting, whereas 2704 does not make vibrations.
Overview of the Makita 2704
See The Current Price
The main feature of the Makita 2704 is the powerful 1650 Watt motor. It has high rigidity that makes accurate cutting possible. The table is extendable, and the fence gives you a large cutting board. It comes with easy and scales that help you prepare your cutting pieces of equipment.

The quick-release guide rail makes it easy for you to operate the table saw. The guide rail is steady, and the rip fence slides on it with accurate cutting. The electronic brake allows you to make an emergency stop when something wrong with the machine. The table saw comes with a fitted electronic soft start and anti-restart function. It comes with a 260mm blade.
The maximum cutting height at 90 degrees is 93mm. When at 45 degrees, it runs up to 64mm. It runs at 4800rotations per minute. It weighs up to 34.9kg. The package includes the Makita 2704 table saw, TCT blade, rip fence, 22mm wrench, 19mm offset wrench, a push stick, and a Bevel guide rule. It has a large On/Off switch button that you cannot mistakenly press the wrong button.
Step 2 | Making the top of the DIY table saw fence
The top of the guide is also the part that ensures that the new guide can be attached to the original one. To let the new guide fit on the original one, measure the distance from the side to the center of the slot in the original guide.You can transfer this distance to the new part.
You can now drill a hole at the marked location. First, drill a hole with the same depth of a washer and a nut with a speed drill or Forstner bit.In this way, the washer and nut will be countersunk during mounting. After drilling the larger hole, drill a hole completely through the wood. Use a drill with the same diameter as the bolt.
Because I did not want screws in the DIY table saw fence on the side that faces the saw blade, I used pocket holes. I made these pocket holes at the bottom of this part. That way the pocket holes will be invisible in the end result and dust cannot collect in the pocket holes.
If you consider buying a pocket hole system, I can recommend this Pocket hole R3 Jr starter package from Kreg. It is not a big investment, and you can do a lot of projects with this system.I’m happy to have this in my workshop.
Upgrade 1 | Clamping system
The clamping system I made in the first video could be better.The block I used was too big and always got in the way when I wanted to place the saw against the out-feed table. That is why I replaced the wooden block with an L-shaped piece of metal. The metal I used for this is about 20 cm (7.87”) long. To attach this metal part to the DIY table saw guide, drill two holes at the same width as the sides of the guide. The holes can be much larger than the screws, so you can adjust the clamp.In that way, the new guide fits optimally on the tabletop.
Now attach this metal clamp to the bottom of the DIY table saw fence with screws and washers. Do not tighten yet so that you can later adjust the clamping system.
Place the new guide on the table-top, but do not clamp it yet. Now go to the metal clamp and push it against the tabletop.Now screw it tightly. When you tighten the guide, this metal clamp will press against the tabletop.Like that, the DIY table saw fence can no longer move. Mission accomplished! You have now converted the weak table saw guide into a sturdy and reliable one.
Step 5 | Reinforcement and clamping system
To make your new DIY table saw fence upgrade firmer, you can now screw a reinforcement block between the two sides at the bottom. This way, the side cannot tilt when you apply pressure to it. I attached the block invisibly by using pocket holes and screws.
I’m not going to discuss the clamping system I made in the first video here. The first system that I used for this had the disadvantage that the block always got in the way when I placed this sawing machine against my out-feed table. The second version I made is a lot better, and I will discuss it in more detail in the Makita Table saw fence upgrade, upgrade 1 clamping system, section down below. I attached the block invisibly by using pocket holes and screws.
DIY Table saw fence upgrade
After working with my new guide for some months I noticed that there was room for improvement. The upgrades I will discuss down below are also the upgrades you could see in the second video.
Upgrade 3 | Making a push stick organizer
Because I would always have my push stick at hand when making cuts with this saw, I made this push stick holder. I can attach this to the table saw guide via the T-track. For this, you need to make a box of plywood in which your push stick fits.
At the back, you need to place two hexagon wood bolts at the same height as the T-track of the table saw guide. Like that, you can easily attach the push stick holder and move or detach it if necessary.
In the same way, I have adapted other jigs, such as my feather board, so that they are very easy to mount on this DIY table saw guide. You can do the same with your jigs.


How to build your workshop on a budget?
Building a workshop may be challenging and requires a lot of trial and error.I know this since I was there as well.As a result of the ultimate small shop expertise that I’ve never seen anywhere else, I gained more insight into building a workshop.That’s how I could spend my money more wisely and save big bucks.
I really suggest it to all of my fellow DIYers and creators!
YOU CAN SPEND YOUR BUDGET ONLY ONCE Stop spending your budget on the wrong things!Let this fantastic training guide you and start saving money today.I already bought this personally and I have never seen anything better than this. Retail $129
Limited price: $39
I’LL GIVE YOU MORE INFO + FREE E-BOOK HERE
Read more related blogs to this one here:
MORE BUILDING A WORKSHOP BLOGS
MORE WOODWORKING JIG BLOGS
MORE FREE WOODWORKING PLANS BLOGS
I hope this information on how to make a table saw fence was helpful, and that this blog and video inspires you. Let me know in a comment below. Feel free to share this blog on Facebook, Pinterest, or other social media. You can do this by using the buttons below or at the top of the blog. It will be much appreciated. I’m looking forward to seeing you soon in another blog or video. Greetings,Christophe, founder of Christofix.comWoodworking | DIY | Home decoration
Download the plans here
Free forever. Check the 3d file options.
€8.99 – $10.5/mo
See all the details.
Adjust to your needs.
Take exact measurements.
Change from metric to imperial.
3D models of all plans uploaded during your membership.
GET STARTED!